Table of Contents
ToggleSetting up a Wyze camera is one of the more straightforward home security projects, no need for running CAT6 cable through walls or hiring an electrician. With just a power outlet, a smartphone, and about 15 minutes, most homeowners can have a working surveillance system keeping an eye on their front porch, garage, or nursery. That said, a smooth setup requires the right prep work and a few key decisions about placement and network connectivity. This guide walks through the entire process, from unboxing to fine-tuning motion detection zones, so the camera works reliably from day one.
Key Takeaways
- Wyze camera setup requires only a power outlet, smartphone, and about 15 minutes—no electrical wiring or professional installation needed for indoor models.
- Your 2.4 GHz Wi-Fi network is essential for Wyze cameras; verify availability before starting setup, as 5 GHz networks are incompatible.
- Mount cameras 8–10 feet high at a 15–30 degree downward angle to optimize facial recognition, field of view, and detection accuracy.
- Configure motion detection zones and adjust sensitivity settings in the Wyze app to minimize false alerts from trees, traffic, or pets.
- Use a microSD card for local continuous recording without monthly fees, or subscribe to Wyze Cam Plus for AI-powered person detection and longer clip retention.
- If your Wyze camera won’t connect to Wi-Fi, restart both the device and router, verify the password, and confirm the status light indicates readiness.
What You Need Before Starting Your Wyze Camera Setup
Before plugging anything in, gather the necessary items and verify network compatibility. Wyze cameras require a 2.4 GHz Wi-Fi network, 5 GHz won’t work. Most modern routers broadcast both, but check the router settings or network name (SSID) to confirm availability.
Materials and tools:
- Wyze camera (any model: Wyze Cam v3, Wyze Cam Pan v3, Wyze Cam Floodlight, etc.)
- Power adapter and USB cable (included with camera)
- Smartphone or tablet (iOS 12+ or Android 6+)
- Stable 2.4 GHz Wi-Fi with password on hand
- MicroSD card (optional, for local storage: Class 10, up to 32 GB recommended)
- Mounting hardware if installing outdoors or on walls (screws, anchors, drill)
Network and account prep:
Make sure the Wi-Fi signal reaches the intended camera location. Walk to the spot with your phone and check signal strength, cameras won’t function reliably with weak connectivity. If the router is on the opposite end of the house, consider a Wi-Fi extender or mesh system.
Create or log into a Wyze account before starting. The app requires an email address and password. Having this ready streamlines the setup process and avoids mid-installation interruptions.
Downloading and Installing the Wyze App
The Wyze app is the control hub for all camera functions, from live viewing to firmware updates. It’s available for free on the Apple App Store and Google Play Store.
Installation steps:
- Open the App Store (iOS) or Google Play Store (Android) on the smartphone.
- Search for “Wyze” and download the official app (look for the blue “W” logo).
- Open the app and tap Sign Up if creating a new account, or Log In if already registered.
- Follow the prompts to verify the email address via a confirmation link sent to the inbox.
- Grant the app necessary permissions: camera access (for QR code scanning), location (for time zone settings), and notifications (for motion alerts).
Once logged in, the app displays a blank home screen with a “+” button in the upper-left corner. This is where new devices get added. Don’t tap it yet, power up the camera first.
Connecting Your Wyze Camera to Power and Wi-Fi
Wyze cameras are powered via USB, so no low-voltage wiring or junction boxes are required. For indoor setups, this means plugging into any standard 120V outlet. Outdoor models like the Wyze Cam Floodlight require hardwiring to a junction box and may need a permit depending on local electrical codes, consult an electrician if unfamiliar with outdoor wiring.
Powering the camera:
- Insert the microSD card into the card slot on the camera base (if using local storage).
- Connect the USB cable to the camera and plug the adapter into an outlet.
- Wait for the status light. Most Wyze cameras flash yellow or blue during startup, then settle into a solid yellow or blinking yellow when ready to pair. Refer to the model-specific quick start guide if the light behavior differs.
If the light doesn’t turn on, check the outlet with another device or try a different USB cable. Faulty cables are a common culprit.
Pairing Your Camera with the Wyze App
Once the camera is powered and the status light indicates readiness, open the Wyze app and begin pairing.
Pairing process:
- Tap the “+” icon in the top-left corner of the home screen.
- Select Add Device, then choose the specific camera model from the list.
- Confirm the status light is flashing yellow (or the color indicated on-screen). If not, press and hold the Setup button on the camera base for 3–5 seconds until the light changes.
- Tap Next, then select the 2.4 GHz Wi-Fi network from the list. Enter the password carefully, case sensitivity matters.
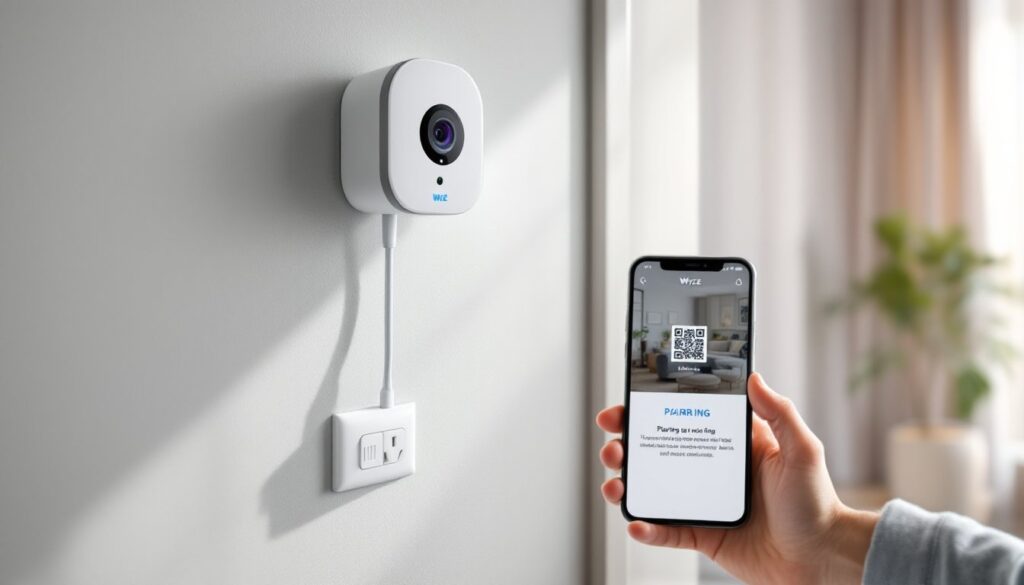
- The app generates a QR code. Hold the phone 6–8 inches in front of the camera lens. The camera emits a tone when it successfully scans the code.
- Wait 30–60 seconds while the camera connects to Wi-Fi and registers with the Wyze servers. The status light turns solid blue when connected.
If the camera doesn’t scan the QR code after several attempts, increase screen brightness to maximum and ensure the lens isn’t obstructed by protective film. Some users find that adjusting the angle or distance helps. Many smart home devices require precise QR code alignment during initial setup, and Wyze cameras are no exception.
Choosing the Perfect Location and Mounting Your Camera
Camera placement determines coverage quality and motion detection accuracy. Poor placement leads to false alerts (from tree branches or passing cars) or blind spots that miss intruders.
Placement guidelines:
- Height: Mount cameras 8–10 feet above ground for optimal facial recognition and a wide field of view. Lower mounts risk tampering: higher mounts lose detail.
- Angle: Aim slightly downward (about 15–30 degrees) to capture faces and activity. Straight-ahead angles work for hallways or narrow spaces.
- Coverage: Wyze Cam v3 offers a 130-degree field of view, position cameras at corners to maximize coverage. Overlapping fields of view from multiple cameras eliminate blind spots.
- Lighting: Cameras with night vision (most Wyze models) need minimal ambient light, but infrared range is limited to about 30 feet. Supplement with motion-activated floodlights for large yards.
- Weather protection: Wyze Cam v3 is IP65-rated (weatherproof), but avoid direct exposure to sprinkler spray or standing water. Models without weatherproofing should stay under eaves or covered porches.
Mounting steps:
- Hold the camera at the intended spot and check the live view in the Wyze app to confirm coverage.
- Mark screw holes with a pencil. Use a level to keep the camera straight, crooked footage looks unprofessional.
- For drywall or wood siding, drill pilot holes with a 3/32-inch bit. For masonry or brick, use a masonry bit and plastic anchors.
- Secure the mounting bracket with the included screws. Do not overtighten, stripped screw holes in plastic brackets are common.
- Attach the camera to the bracket via the magnetic base (v3 models) or twist-lock mechanism (older models).
- Route the USB cable along the wall or through a small hole drilled into the house. Use cable clips or weatherproof conduit for a clean, durable installation.
For the Wyze Cam Floodlight, refer to the manufacturer’s wiring diagram and local electrical codes. Floodlight installations typically require connecting black (hot), white (neutral), and green (ground) wires to an existing junction box. Turn off power at the breaker before working on any electrical connections.
Configuring Your Camera Settings for Optimal Performance
Out of the box, Wyze cameras use default settings that work for most users, but fine-tuning improves performance and reduces unnecessary alerts.
Key settings to adjust:
- Motion Detection Zones: Tap the camera in the app, then Settings > Event Recording > Detection Zone. Draw a box around areas to monitor (like the driveway) and exclude areas that trigger false alerts (like a busy street or swaying tree). This dramatically reduces notification fatigue.
- Detection Sensitivity: Set under Event Recording > Detection Settings. High sensitivity catches subtle motion but increases false positives. Start at 50% and adjust based on results.
- Night Vision Mode: Choose Auto (switches based on ambient light), On (always uses infrared), or Off. Auto works well for most setups, but manual control helps in areas with inconsistent lighting.
- Notifications: Enable Push Notifications for real-time alerts, but customize under Settings > Notifications. Turn off notifications during known high-activity times (like when kids play in the yard) to avoid alert overload.
- Video Quality: Set under Advanced Settings. HD (1080p) provides clear footage but uses more bandwidth. SD (360p) conserves data for slower connections. Many smart home enthusiasts recommend HD for primary security cameras and SD for secondary monitoring.
- Local Storage vs. Cloud: Insert a microSD card for continuous recording without subscription fees. Cloud storage via Wyze Cam Plus ($1.99/month per camera as of 2026) adds AI-powered person detection and longer clip retention.
Firmware updates:
Check for updates under Settings > Device Info > Firmware Version. Wyze regularly releases updates that improve connectivity, add features, and patch security vulnerabilities. Enable Auto-Update to keep cameras current without manual intervention.
Troubleshooting Common Wyze Camera Setup Issues
Even straightforward setups hit snags. Here’s how to resolve the most common problems.
Camera won’t connect to Wi-Fi:
- Verify the network is 2.4 GHz. Check router settings or try disabling 5 GHz temporarily.
- Move the camera closer to the router during setup. Weak signal strength causes connection failures.
- Restart the router and camera. Unplug both, wait 30 seconds, then power them back on.
- Double-check the Wi-Fi password. Re-enter it in the app, paying attention to capitalization and special characters.
QR code won’t scan:
- Increase phone screen brightness to maximum.
- Remove any protective film from the camera lens.
- Adjust the distance between phone and camera, 6 to 8 inches works best.
- Try a different phone or tablet if available.
Camera shows offline in app:
- Check if the status light is solid blue. If not, the camera lost Wi-Fi connection.
- Restart the camera by unplugging it for 10 seconds.
- Verify the router didn’t change settings or reboot, which can reset device connections.
- Re-add the camera in the app if it remains offline after restart.
Poor video quality or lag:
- Lower video quality to SD in camera settings to reduce bandwidth usage.
- Upgrade internet speed if multiple devices are streaming or gaming simultaneously.
- Use a Wi-Fi extender or mesh system to improve signal strength at the camera location.
False motion alerts:
- Refine detection zones to exclude moving branches, passing cars, or pets.
- Lower detection sensitivity incrementally until alerts match actual events.
- Disable notifications during high-traffic times or enable Person Detection (requires Cam Plus subscription) to filter out non-human movement.
Camera not recording to microSD card:
- Remove and reinsert the card to ensure proper seating.
- Format the card in the app under Settings > Advanced Settings > Local Storage > Format. Use FAT32 format for cards up to 32 GB.
- Replace the card if formatting fails, Class 10 cards from reputable brands (Samsung, SanDisk) perform best.
If problems persist after these steps, contact Wyze support or check the community forums. Firmware bugs occasionally require patches, and support staff can push updates or troubleshoot account-specific issues.
With the camera installed, connected, and configured, the system is ready to monitor the property reliably. Regular maintenance, cleaning the lens every few months, checking for firmware updates, and reviewing detection zones, keeps performance consistent over time.