Table of Contents
ToggleA dishwasher cabinet isn’t just a box under the counter, it’s the structural foundation that keeps your appliance level, secure, and integrated into your kitchen layout. Get it wrong, and you’re looking at leaks, poor drainage, a misaligned door, or worse, a voided warranty. Whether you’re retrofitting a new dishwasher into an older kitchen or planning a full remodel, understanding how dishwasher cabinets work, and how they differ from standard base cabinets, saves time, money, and frustration. This guide walks through dimensions, installation steps, and design strategies to help homeowners and DIYers get it right the first time.
Key Takeaways
- A dishwasher cabinet is a modified base cabinet designed to house a built-in dishwasher and must be structurally sound to prevent leaks, misalignment, and warranty voidance.
- Standard dishwasher cabinet dimensions require a 24.5 to 25-inch wide opening, 34 to 34.5 inches in height, and 24 to 24.5 inches deep, with proper side and rear clearances for plumbing and electrical connections.
- Installation involves seven key steps—from preparing the opening and running plumbing/electrical to leveling the dishwasher and securing it to the countertop—and should be level within 1/8 inch for proper drainage.
- Panel-ready dishwashers offer a seamless, integrated look with custom wood panels that match cabinetry, while built-in solutions with flanking base cabinets remain the standard for most kitchens.
- Positioning your dishwasher cabinet within 36 inches of the sink simplifies plumbing connections, and incorporating design details like matching handles and aligned toe kicks creates a polished, intentional appearance.
- Proper ventilation, noise dampening pads, and accessible electrical/water shut-off points in adjacent cabinets ensure long-term reliability and ease of future service.
What Is a Dishwasher Cabinet and Why Does It Matter?
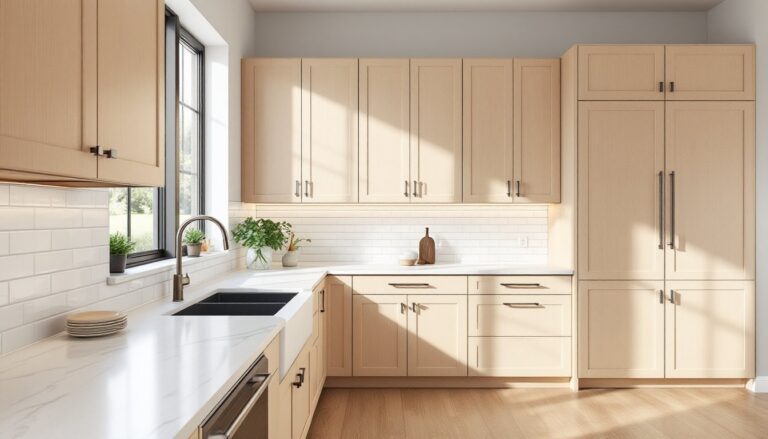
A dishwasher cabinet is a modified base cabinet designed to house a built-in dishwasher. Unlike a standard base cabinet with shelves and a full back panel, a dishwasher cabinet typically has an open front, no back or bottom (since the dishwasher itself provides structure), and side panels that anchor the appliance in place.
The term can also refer to the dishwasher cabinet box, the framed enclosure formed by adjacent cabinetry, countertop, and floor. This box must meet precise dimensions to ensure the dishwasher fits, levels properly, and connects to plumbing and electrical without interference.
Why does this matter? Because dishwashers are heavy (60–100 lbs empty), vibrate during operation, and require access to water supply, drain lines, and a dedicated 120V circuit. A poorly sized or flimsy cabinet box can cause:
- Misalignment: Dishwasher door hits adjacent cabinet doors or doesn’t sit flush with countertop.
- Vibration and noise: Loose mounting points amplify operational noise.
- Leaks: Poor leveling causes water to pool or drain improperly.
- Voided warranties: Many manufacturers require proper installation per their specs.
If you’re working with an existing kitchen, the cabinet box is already framed. If you’re building or remodeling, you’ll either leave an open space between two base cabinets or order a purpose-built dishwasher cabinet from your cabinetry supplier.
Standard Dishwasher Cabinet Dimensions and Requirements
Most dishwashers in the U.S. follow standard sizing, but there’s a range, and clearances matter. Here’s what to plan for:
Width: Standard dishwashers are 24 inches wide. Compact models are 18 inches. The cabinet opening should be 24.5 to 25 inches to allow for side clearance and leveling adjustments.
Height: Dishwashers range from 33.5 to 34.5 inches tall (adjustable leveling legs add about 0.5–1 inch). Standard countertop height is 36 inches, leaving roughly 1.5–2 inches of clearance under the countertop. The cabinet opening height should be 34 to 34.5 inches minimum.
Depth: Dishwashers are typically 24 inches deep (not including the door). Base cabinets are usually 24 inches deep (nominal), but the dishwasher needs to sit slightly recessed so the door front aligns with cabinet faces. Plan for a 24 to 24.5-inch deep opening, accounting for water supply and drain lines behind the unit.
Clearances:
- Side clearance: 0.25 inches on each side prevents binding and allows for door movement.
- Top clearance: 1–2 inches for countertop removal/service and air circulation.
- Rear clearance: 2–3 inches for plumbing connections and electrical outlet.
Check your dishwasher’s installation manual before finalizing the cabinet opening. Dimensions can vary slightly by brand and model. If you’re ordering custom cabinetry, provide the appliance model number so the cabinet shop can frame the opening precisely.
Structural notes: The dishwasher mounts to the underside of the countertop with brackets and may also attach to adjacent cabinet sides. The floor must be level and capable of supporting 150+ lbs (loaded dishwasher). If installing over vinyl or engineered flooring, confirm the subfloor is solid and that you’re not spanning joists without support.
Types of Dishwasher Cabinets for Different Kitchen Layouts
Not all kitchens frame dishwashers the same way. The type of cabinet solution depends on your layout, appliance choice, and design goals.
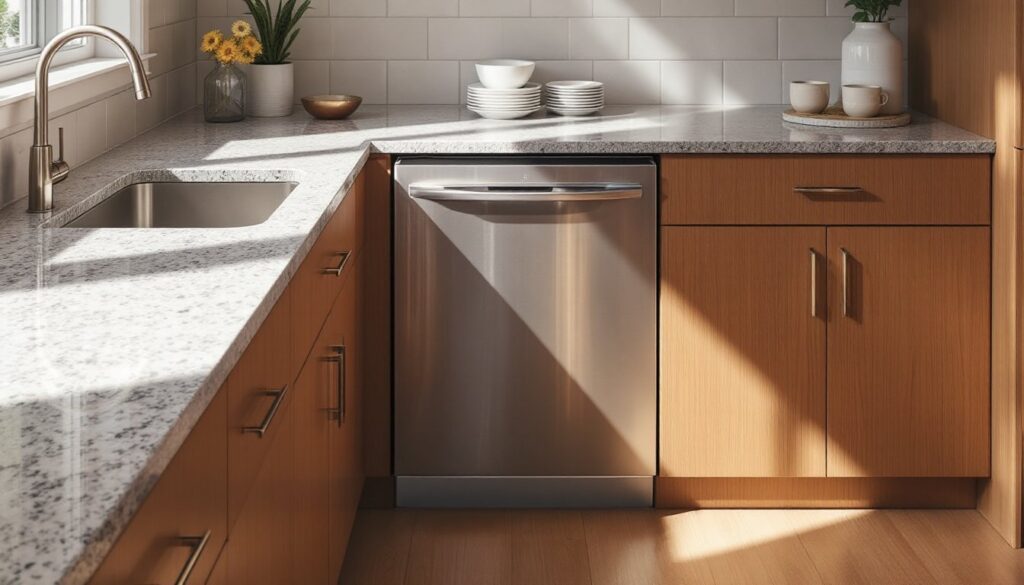
Built-In Dishwasher Cabinets
This is the standard setup: two base cabinets flank the dishwasher opening, creating the cabinet box. The dishwasher slides into the gap, anchors to the countertop and side panels, and the front door remains visible (usually stainless steel or a panel-ready front).
When to use it: New construction, full kitchen remodels, or any layout where you can plan cabinet placement around the appliance.
What to specify: If ordering cabinets, request a dishwasher opening or dishwasher filler option. Some cabinet lines include finished side panels or fillers that give a cleaner look than raw cabinet ends.
Pro tip: Position the dishwasher within 36 inches of the sink. This keeps plumbing runs short and simplifies drain/supply hookups. Most codes require a high loop or air gap on the drain line to prevent backflow. For more ideas on integrating appliances into compact kitchen layouts, consider under-counter placement near prep zones.
Panel-Ready and Custom Cabinet Solutions
Panel-ready (or cabinet-front) dishwashers accept a custom wood panel that matches your cabinetry, making the appliance virtually disappear. The panel attaches to the dishwasher door with provided brackets.
When to use it: High-end or traditional kitchens where appliances are integrated for a furniture-like appearance. Common in European-style or modern minimalist designs where visual continuity is prioritized.
Cabinet requirements: Same dimensional opening as a standard built-in, but you’ll need to order a matching door panel from your cabinet supplier (typically 23.5 × 34 inches, but verify with the dishwasher manufacturer). The panel adds weight, so confirm the dishwasher door hinges can handle it, most panel-ready models are rated for this.
Installation note: Panel-ready dishwashers often come without a visible control panel on the door front. Controls are on the top edge, accessible when the door is open. This affects handle placement and overall look.
Alternative: Freestanding or portable units. If you’re renting or can’t modify cabinetry, portable dishwashers on casters can connect to the sink faucet. They’re not built into a cabinet box but can be stored in a pantry or utility area when not in use. Not ideal for permanent solutions, but handy for temporary setups.
How to Install a Dishwasher Cabinet: Step-by-Step Guide
Installing a dishwasher into a cabinet opening is a manageable DIY project if you’re comfortable with basic plumbing and electrical. Most jurisdictions allow homeowners to install their own appliances, but if you’re adding new electrical or plumbing lines, check local codes, some require licensed contractors or permits.
Tools & Materials:
- Adjustable wrench
- Screwdriver (Phillips and flathead)
- Torpedo level
- Drill/driver with bits
- Teflon tape
- Wire nuts (if hardwiring)
- Dishwasher connector kit (supply line, drain hose, elbow fittings)
- Safety gear: gloves, safety glasses
Step 1: Prepare the opening.
Remove the old dishwasher if present. Shut off water at the supply valve (usually under the sink) and disconnect electrical at the breaker. Clear out any debris, check that the floor is level, and confirm the opening dimensions match your new unit. If the floor isn’t level, use shims under the dishwasher feet later.
Step 2: Rough in plumbing and electrical.
Run a 3/8-inch copper or braided stainless supply line from the hot water shut-off under the sink to the front left or right corner of the dishwasher opening (check your model’s specs). Install a drain line from the dishwasher discharge to the sink drain or garbage disposal air gap. Use a high loop (securing the drain hose to the underside of the countertop) to prevent backflow. For electrical, you’ll need a dedicated 120V, 15-amp circuit. Most dishwashers either hardwire via a junction box or plug into an outlet inside the adjacent cabinet. If you’re unsure about electrical, hire a licensed electrician.
Step 3: Slide in the dishwasher.
Carefully tip the unit back slightly and slide it into the opening. Keep the power cord and hoses untangled. Stop when the front of the door is roughly flush with the cabinet fronts. Don’t force it, if it binds, check for obstructions or measure the opening again.
Step 4: Level and adjust.
Use the adjustable feet (usually front legs) and a torpedo level placed on the top edge of the door. Level side-to-side and front-to-back. Most manufacturers require the unit to be level within 1/8 inch to prevent poor drainage or vibration. If the floor slopes, use shims under the feet.
Step 5: Connect supply and drain.
Attach the supply line to the dishwasher inlet valve (hand-tighten, then snug with a wrench, don’t overtighten). Secure the drain hose with a hose clamp. Double-check that the high loop is in place. Many users share their installation experiences and troubleshooting tips in online forums, which can be helpful if you run into fitment issues.
Step 6: Secure to countertop and sides.
Most dishwashers come with mounting brackets that screw into the underside of the countertop through holes in the top rail of the dishwasher. Use the screws provided (typically #8 or #10 sheet metal screws). If your countertop is stone or concrete, adhesive brackets or side-mounting to adjacent cabinets may be needed instead.
Step 7: Connect electrical and test.
If hardwiring, connect the dishwasher wires to the circuit wires in the junction box (black to black, white to white, ground to ground) using wire nuts. Replace the junction box cover. If it’s a plug-in model, plug it in. Turn on water supply and power at the breaker. Run a test cycle and check for leaks at all connections.
Safety note: Always turn off power at the breaker before handling electrical connections. Wear gloves when handling sharp sheet metal edges on the dishwasher frame.
Design Tips for Integrating Your Dishwasher Cabinet Seamlessly
A well-integrated dishwasher looks intentional, not like an afterthought squeezed into leftover space. Here’s how to make it work visually and functionally.
Match cabinet faces. If you’re doing panel-ready, order the door panel at the same time as your cabinets to ensure grain and finish match. Specify the hinge side and handle orientation, most dishwashers can be configured for left or right swing.
Coordinate handles and hardware. If your cabinets have bar pulls or knobs, add the same hardware to the dishwasher panel. Some panel-ready models include a mounting rail for handles: others require you to drill into the panel. Measure twice, drill once.
Mind the toe kick. The dishwasher’s front toe kick should align with adjacent cabinet toe kicks (usually 3–4 inches tall). Most dishwashers have an adjustable or removable toe kick panel. If yours doesn’t match, you can order a custom toe kick from your cabinet supplier or trim one to fit.
Plan for workflow. Place the dishwasher to the left or right of the sink (not directly under it). This allows a helper to rinse while you load. If you have a large family, consider a second dishwasher on an island or in a butler’s pantry, just ensure each has its own circuit and plumbing.
Avoid dead corners. Don’t box a dishwasher into a corner where the door can’t fully open or blocks a walkway. A 90-degree corner placement works only if there’s at least 21 inches of clearance for the door to swing open fully.
Ventilation and noise. Dishwashers generate heat and vibration. If installing in a peninsula or island, ensure there’s airflow around the unit and that vibration won’t travel through the structure. Adding foam or rubber pads between the dishwasher and cabinets can dampen noise.
Future access. Leave the electrical junction and water shut-off accessible in the adjacent cabinet. You or a repair tech will thank yourself when it’s time to service the unit.
A thoughtful dishwasher cabinet setup blends function with aesthetics, making daily kitchen tasks smoother and keeping the appliance reliable for years.