Table of Contents
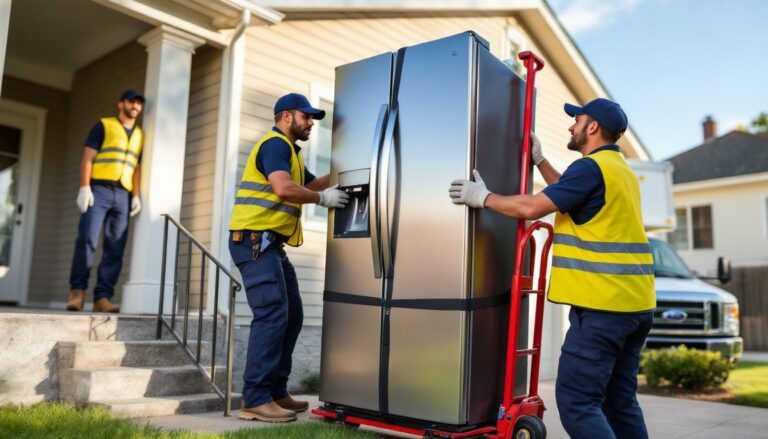
ToggleKitchen cabinets eat up 30–40% of most renovation budgets, but that doesn’t mean homeowners are stuck with particleboard disasters or outdated oak. The cabinet industry has shifted dramatically over the past few years. Manufacturers now offer high-quality materials, modern finishes, and modular systems at price points that would’ve been impossible a decade ago. Whether working with a tight budget or just refusing to overpay for plywood and hinges, it’s entirely possible to achieve a magazine-worthy kitchen without the magazine-worthy price tag. The key is knowing which shortcuts to take, and which ones will haunt a homeowner three years down the line.
Key Takeaways
- Affordable kitchen cabinets from stock, RTA, or semi-custom options can deliver quality and style at 40–60% less cost than custom cabinetry by leveraging bulk manufacturing and eliminating middleman markups.
- RTA (ready-to-assemble) cabinets and online direct-to-consumer retailers offer significant savings, but require basic assembly skills and time investment, while big-box stores provide faster access to affordable kitchen cabinets with design support.
- Hardware upgrades, under-cabinet lighting, finish refinishing, and crown molding transform budget cabinets into high-end-looking kitchens at minimal additional cost.
- DIY installation can save $1,500–$4,000 in labor but demands precision skills, proper tools, a level floor reference, and stud-mounted fastening to avoid installation failures.
- Stock cabinets work best for straightforward layouts, while semi-custom options bridge the gap for kitchens with non-standard dimensions or design ambitions without full custom pricing.
- Professional installation ($100–$300 per cabinet) may be worth the investment for complex layouts, uneven floors, or homeowners uncomfortable with power tools and precise measurements.
Why Kitchen Cabinets Don’t Have to Break the Bank
The sticker shock on custom cabinetry comes from labor, not just materials. A cabinet shop charges for design time, shop drawings, custom millwork, and hand-finishing. That’s justifiable for a historic restoration or a kitchen with odd angles and ceiling heights, but most kitchens follow standard dimensions.
Stock and RTA (ready-to-assemble) cabinets are built to those standards in bulk, which drops per-unit costs significantly. They’re made in factories with CNC precision, consistent quality control, and economies of scale that a local shop can’t match. The trade-off isn’t quality, it’s customization. Homeowners work within set widths (usually in 3-inch increments), standard heights (typically 30″, 36″, or 42″ for uppers), and limited finish options.
Another cost driver: solid wood vs. engineered materials. Plywood box construction with hardwood face frames offers excellent durability at a fraction of the cost of solid hardwood throughout. Many budget lines now use dovetail or dowel joints instead of staples, a build quality that was premium-only five years ago.
Skipping the middleman also shaves hundreds off the final bill. Big-box stores and direct-to-consumer brands eliminate showroom overhead and commissioned designers. A homeowner who can measure accurately and plan a layout (or hire a kitchen designer for a flat fee) can access wholesale pricing that used to be trade-only.
Best Types of Affordable Kitchen Cabinets
Not all budget cabinets are created equal. Understanding the categories helps match the right product to the project’s scope and skill level.
Ready-to-Assemble (RTA) Cabinets
RTA cabinets ship flat-packed and require assembly on-site. This cuts shipping costs and allows manufacturers to price aggressively. Quality varies wildly, so focus on construction details: look for plywood panels (not particleboard), cam-lock or wooden dowel fasteners (not just screws into fiberboard), and concealed Euro-style hinges with soft-close mechanisms.
Assembly isn’t difficult, but it’s time-consuming. Budget 20–30 minutes per box for a first-timer, less once the process clicks. A rubber mallet, wood glue, and a drill with a Phillips bit are the only tools needed. Some homeowners find the process tedious: others appreciate the cost savings, RTA can run 40–60% less than pre-assembled equivalents.
Drawback: RTA cabinets aren’t ideal for anyone uncomfortable with basic assembly or without a clean workspace. Boxes need to be assembled before installation, which means dedicating garage or basement space if the kitchen is still in use.
Stock Cabinets vs. Semi-Custom Options
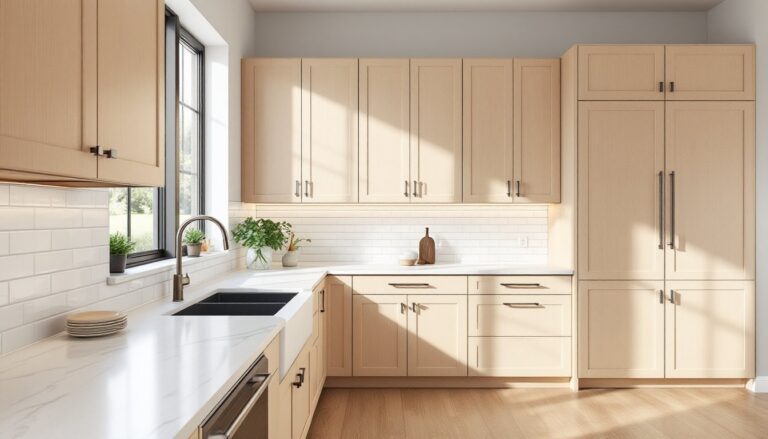
Stock cabinets are pre-manufactured in standard sizes and finishes, available for immediate pickup or short lead times (days, not weeks). They’re the cheapest option and work well for straightforward layouts. Most big-box stores carry multiple lines at different price tiers. Expect thermofoil or laminate doors at the lowest end, and paint-grade MDF or stained hardwood veneer in mid-range stock lines.
Semi-custom cabinets cost more but offer modifications: custom depths, added rollouts, premium finishes, or non-standard heights. They’re built to order with 4–8 week lead times. For kitchens with tricky dimensions or design ambitions beyond builder-grade white, semi-custom bridges the gap without going full custom.
The sweet spot for many DIYers: stock boxes with upgraded hardware and a few semi-custom pieces where they matter most, a deep pantry cabinet, a corner Lazy Susan, or a range hood surround.
Where to Buy Affordable Kitchen Cabinets
The cheapest place to buy kitchen cabinets depends on the homeowner’s priorities: speed, selection, or support.
Big-box retailers (Home Depot, Lowe’s, Menards) dominate the budget segment. They stock multiple lines, offer design services (often free with purchase), and provide straightforward return policies. Pricing is competitive, especially during spring and fall promotions. Installation is available, though often subcontracted, vet the installer separately.
Online-only RTA retailers (CabinetJoint, Barker Cabinets, RTA Cabinet Store) specialize in direct-to-consumer sales. Prices can undercut big-box options by 20–30%, but support is remote. Expect detailed installation guides, phone/email help, and sample doors for finish-matching, but not an in-person design consultation. Shipping costs and potential damage in transit are considerations.
IKEA deserves its own mention. The SEKTION system offers excellent value for cheap cabinets kitchen projects, especially for modern or minimalist aesthetics. The carcasses are rock-solid (5/8″ melamine with integrated hanging rails), and the modular system is endlessly hackable. Trade-offs: particleboard (not plywood), proprietary dimensions that don’t align with standard appliances without filler strips, and a learning curve for the installation system. Plan on spending a weekend in the kitchen planner tool before ordering.
Regional cabinet outlets and Habitat for Humanity ReStores sometimes carry overstock, returns, or lightly used cabinetry at deep discounts. Selection is unpredictable, but a homeowner with flexibility on finish or layout can score unbeatable deals on quality boxes.
According to national averages, professional installation can range from $100 to $300 per cabinet depending on complexity and region, those considering professional installation costs should factor this into the total budget early.
How to Make Budget Cabinets Look Expensive
The gap between cheap and cheap-looking is mostly in the details. A few targeted upgrades transform builder-grade boxes into something showroom-worthy.
Hardware matters more than most homeowners expect. Swapping stock pulls for brushed brass or matte black bar pulls (available for $2–5 each in bulk) instantly elevates flat-front or Shaker doors. Consistent sizing and placement, centered on drawers, positioned 2½–3 inches from the corner on doors, gives a custom look. Use a template or drill jig to keep holes aligned: nothing screams “budget” louder than crooked knobs.
Under-cabinet lighting adds depth and polish. Battery-powered LED puck lights cost $20–30 for a six-pack and install with adhesive strips, no wiring required. For a cleaner look, hardwired LED tape kits run about $50–80 and integrate into a kitchen’s existing circuits (shut off power at the breaker before installation).
Finish quality: Budget cabinets often come with passable finishes, but minor flaws, rough edges, visible seams, or blotchy stain, stand out in bright kitchen light. A light sanding (220-grit) followed by a clear coat (water-based poly or wipe-on varnish) smooths surfaces and deepens color. For painted cabinets, adding a final coat of low-VOC topcoat prevents chipping and makes cleaning easier. This is especially useful for areas around the sink and cooktop where grease and moisture accumulate.
Crown molding and a finished toe kick close the gap between cabinets and ceiling or floor, eliminating the unfinished look of exposed gaps. Pre-primed MDF crown costs $1–2 per linear foot and installs with a miter saw, brad nailer, and construction adhesive. It’s one of those details that people won’t consciously notice, but its absence makes a kitchen feel incomplete.
Many kitchen design experts advocate for cohesive styling elements that create visual continuity, uniform hardware finishes, matching wood tones, or a single accent color repeated across the space.
DIY Installation: Is It Worth the Savings?
Installing cabinets isn’t rocket science, but it’s precise work that punishes sloppiness. The savings are real, labor typically runs $1,500–4,000 for an average kitchen, but so are the risks.
Skill requirements: A DIYer needs to find studs, level boxes on uneven floors, shim accurately, and understand how to scribe filler strips to out-of-plumb walls. Most kitchens have at least one wall that’s off by ¼–½ inch, and cabinets must be level and plumb regardless. A 4-foot or 6-foot level, stud finder, and shims (both wood and plastic) are non-negotiable. A laser level speeds up layout, especially for upper cabinets.
Tools needed: Drill/driver, circular saw or miter saw (for cutting filler strips and molding), clamps, and a helper for hanging uppers. Wall cabinets are awkward, not necessarily heavy, but holding one against the wall while driving screws into studs requires a second set of hands or a cabinet jack (rentable for $20–30/day).
Installation steps (simplified):
- Remove old cabinets if applicable. Shut off plumbing and electrical to avoid accidents. Wear gloves and safety glasses, old cabinets often have staples, sharp edges, and decades of grime.
- Mark stud locations and draw a level reference line for upper cabinets (typically 54 inches above finished floor for 18-inch uppers over standard 36-inch base cabinets).
- Install uppers first to avoid working over base cabinets. Start at a corner or high point and work outward. Screw through the cabinet’s hanging rail or back panel into studs with 2½-inch or 3-inch cabinet screws. Use shims to achieve plumb and level.
- Install base cabinets, starting at the same corner. Shim until level, clamp adjacent boxes together, then screw through face frames to join them. Secure to wall studs.
- Install fillers, trim, and toe kicks. Scribe fillers to fit irregular walls using a compass or contour gauge.
- Attach doors and drawers, adjust hinges and drawer glides for smooth operation.
Permitting: Most jurisdictions don’t require permits for cabinet replacement, but any electrical or plumbing modifications do. If relocating a sink or adding a new outlet, hire a licensed electrician or plumber for those portions, or pull permits and have inspections done if doing it yourself. Codes vary by locality, check with the local building department before starting.
When to call a pro: If the kitchen has severe floor or wall irregularities, the homeowner is uncomfortable with power tools, or the layout involves complex island or peninsula configurations, the cost of professional installation is worth it. A botched install can mean doors that won’t close, drawers that bind, or worse, cabinets pulling away from the wall. Homeowners exploring renovation expenses often turn to project cost guides to balance DIY savings against professional quality assurance.
Safety note: Always wear safety glasses when cutting or drilling. Dust masks are essential when working with MDF or particleboard, which release fine particles. Unplug power tools when changing blades or bits.