Table of Contents
ToggleA microwave range hood, sometimes called an over-the-range microwave or microwave oven range hood, delivers two appliances in one footprint, saving counter space and streamlining kitchen function. If you’re planning a kitchen remodel or just tired of grease-spattered cabinets and a bulky countertop microwave hogging workspace, this combo unit might be the smartest move you’ll make. But not all microwave range hood combos vent the same way, and choosing the wrong model can leave you with weak airflow or complicated installation headaches. This guide walks through what these units actually do, how to pick one that fits your cooking habits and cabinet configuration, and what you need to know before drilling the first hole.
Key Takeaways
- A microwave range hood combines a microwave oven with ventilation in one unit, saving 2–3 square feet of counter space and reducing installation costs compared to buying separate appliances.
- Vented microwave range hoods exhaust air outside for superior odor and heat removal, while recirculating models filter air back into the kitchen with no ductwork—choose based on your home’s layout and cooking frequency.
- CFM (cubic feet per minute), noise levels, filter type, and interior capacity are critical features to evaluate; most effective microwave range hoods deliver 300–400 CFM with adjustable fan speeds.
- Installation requires a dedicated 120V electrical circuit, wall stud anchoring (not drywall), and proper height clearance—typically 13–16 inches above the cooktop—so hiring a professional installer may be worthwhile for safety.
- Monthly grease filter cleaning and annual ductwork inspection prevent airflow loss and fire hazards, while regular fan testing and proper maintenance can extend your microwave range hood’s lifespan to 10–15 years.
What Is a Microwave Range Hood?
A microwave range hood is an appliance that combines a standard microwave oven with a ventilation hood designed to mount directly above your cooktop or range. Instead of two separate units, one for reheating and one for venting, this combo integrates both functions into a single chassis that installs beneath a cabinet or to the wall.
Most models measure 30 inches wide, matching standard range widths, though 24-inch and 36-inch versions exist for narrower or commercial-style setups. The microwave cavity sits in the main body, while the underside houses a fan, grease filters, and sometimes a cooktop light.
Unlike a freestanding countertop microwave, these units must be secured to wall studs and, in vented configurations, connected to ductwork that exhausts to the outside. The installation height typically falls between 66 and 72 inches from the floor, or 13 to 16 inches above the cooktop surface, per manufacturer specs and fire safety clearances. Check your range’s manual, gas ranges often require greater clearance than electric due to open-flame combustion.
These appliances don’t replace a dedicated range hood in raw CFM performance, but they’re a practical compromise when space and budget matter.
Benefits of Installing a Microwave Range Hood
Space efficiency is the headline advantage. By moving the microwave off the counter and into overhead real estate, you reclaim 2 to 3 square feet of workspace, critical in smaller kitchens where every inch counts.
Cost savings add up, too. Buying and installing two separate appliances, microwave plus hood, often runs hundreds more than a single combo unit. You’ll also save on electrical work, since most microwave range hoods plug into a single 120V outlet inside the cabinet above.
Simplified workflow matters when you’re juggling pots and reheating. Grabbing a plate from the microwave above the stove is faster and more ergonomic than bending to a lower cabinet or reaching across the counter.
Finally, these units handle basic ventilation needs for typical home cooking. If you’re sautéing vegetables, simmering pasta, or pan-frying chicken, the built-in fan and grease filters will capture most airborne particulates and odors. They won’t match the CFM of a commercial-grade hood, but for everyday use, they’re more than adequate, and far better than no ventilation at all.
Types of Microwave Range Hoods: Vented vs. Recirculating
Microwave range hoods come in two ventilation configurations, and choosing the wrong one can mean months of lingering cooking smells.
Vented (Ducted) Systems
A vented system exhausts air directly outside through metal ductwork. The fan pulls steam, smoke, and grease-laden air up through filters, into a duct run, and out through an exterior wall or roof cap. This is the gold standard for removing heat and odors.
Vented installs require 3¼-inch by 10-inch rectangular duct or 6-inch round duct, routed with as few bends as possible to maximize airflow. Each 90-degree elbow cuts efficiency by roughly 15 to 20 percent, so plan the shortest, straightest path.
You’ll need access to an exterior wall or soffit. If your range sits on an interior wall with no feasible duct route, a vented system may not be practical without major renovation.
Recirculating (Ductless) Systems
A recirculating system filters air through a charcoal or carbon filter, then blows it back into the kitchen. No ductwork, no exterior penetration, just plug it in and mount it.
The tradeoff? These units don’t remove heat or moisture, only odors and some particulates. If you do a lot of high-heat searing or boil pasta daily, recirculating won’t keep your kitchen as comfortable. Charcoal filters also need replacement every 3 to 6 months, adding recurring cost and maintenance.
Recirculating is the go-to when ducts aren’t an option, condos, apartments, or older homes where running ductwork means tearing into walls. Many modern over-the-range microwaves ship convertible, so you can switch modes later if you add ductwork during a remodel.
Key Features to Look for When Buying
CFM (cubic feet per minute) measures how much air the fan moves. Most microwave range hoods deliver 300 to 400 CFM. That’s enough for gas or electric ranges under 60,000 BTU. If you have a high-output range or do frequent wok cooking, look for 400 CFM minimum.
Fan speed settings matter more than you’d think. A two-speed fan is loud and inflexible: three or four speeds let you dial in just enough ventilation without roaring jet-engine noise during a quiet breakfast.
Noise level, measured in sones, tells you how loud the unit runs. Anything under 2.0 sones at max speed is reasonably quiet: above 4.0 sones and you’ll need to raise your voice. Check the spec sheet, marketing materials often omit this.
Sensor cooking and auto-cook menus are standard now, but build quality varies. Look for units with humidity sensors that actually adjust cook time, not just timed presets.
Interior capacity ranges from 1.6 to 2.2 cubic feet. If you regularly reheat dinner plates or casserole dishes, don’t settle for the smallest cavity. Measure your most-used dishes before buying.
Grease filter type is either mesh aluminum or baffle stainless. Aluminum is cheaper and dishwasher-safe: baffle filters are quieter and capture grease more efficiently. Both need cleaning every month or two, depending on how much you cook.
Finally, check the mounting template and bracket design. Some manufacturers include a full install kit with bolts, bracket, and damper: others leave you hunting for hardware. Read reviews, flimsy brackets and vague instructions are common complaints.
Installation Basics: What You Need to Know
Installing a microwave range hood is a two-person job. These units weigh 50 to 70 pounds, and you’ll need one person supporting the appliance while the other secures the mounting bracket. Don’t try this solo.
Prep and Planning
Start by locating wall studs behind the range. The mounting bracket must anchor into studs, not just drywall. Use a stud finder and mark centerlines with painter’s tape.
Measure the height clearance your range manufacturer specifies, usually 30 inches for electric, 36 inches for gas. Some local codes set different minimums, so check with your building department if you’re unsure.
If you’re installing a vented model, confirm your ductwork terminates outside with a roof or wall cap, not into an attic or crawl space. Venting into enclosed spaces violates most building codes and creates moisture problems.
Electrical Requirements
Most units need a dedicated 120V, 15-amp circuit with a receptacle inside the cabinet above the microwave. If there’s no outlet, you’ll need to run new wiring, this may require a permit and a licensed electrician, depending on jurisdiction. Don’t tap into the range circuit: microwaves draw enough power to trip a shared breaker under load.
Mounting Process
- Install the mounting bracket to the wall studs using the provided template. Drive 3-inch wood screws (typically #10 or #12) through the bracket holes into studs. Drywall anchors won’t hold the weight.
- Lift the microwave onto the bracket with a helper. Most designs have a rear hook that slides onto the bracket, letting you rest the unit while you secure it.
- Fasten the top by drilling through the cabinet floor or bottom of the upper cabinet into the microwave’s top flange. Use the screws provided, typically 1-inch to 1½-inch panhead screws.
- Connect the ductwork (if vented) by attaching the duct collar to the top or rear exhaust port and sealing joints with foil tape, not duct tape. Foil tape withstands heat and grease.
- Plug in the unit and test fan speeds, light, and microwave function before closing up.
If you’re uncomfortable working with electrical or cutting ductwork, hire a handyman or appliance installer. Most charge $100 to $200 for labor, and it’s worth it to avoid a crooked mount or electrical short. For a detailed walkthrough of over-the-range microwave installation, including ductwork routing and code considerations, consult a comprehensive buyer’s guide.
Tools You’ll Need
- Drill/driver with Phillips and 3/16-inch bits
- Stud finder
- Level (24-inch or longer)
- Measuring tape
- Tin snips (for ductwork)
- Safety glasses and gloves
A reciprocating saw or hole saw may be necessary if you’re cutting a new duct opening through an exterior wall.
Maintenance Tips to Keep Your Microwave Range Hood Running Smoothly
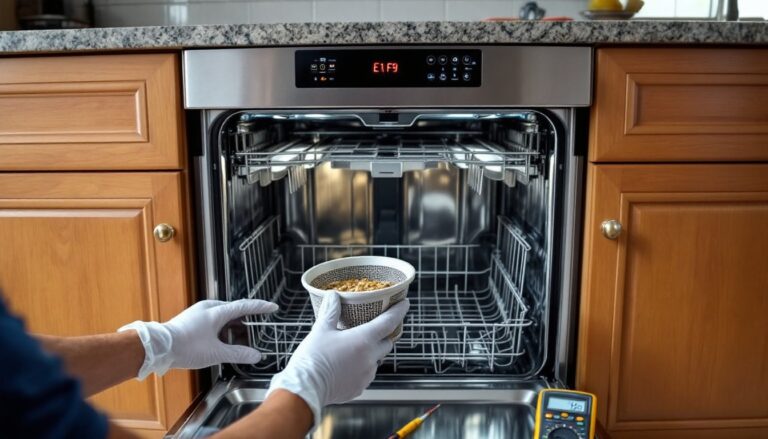
Clean the grease filters monthly. Pop the mesh or baffle filters out (most slide or hinge down) and run them through the dishwasher on the top rack, or hand-wash with hot soapy water. Grease buildup clogs airflow and creates a fire hazard. If you fry or sear often, clean them every two weeks.
Replace charcoal filters every 3 to 6 months if you’re running recirculating mode. These filters don’t clean, they saturate and stop working. Mark your calendar: a spent filter just recirculates grease and odor.
Wipe down the exterior and interior weekly with a damp microfiber cloth and a mild degreaser. Avoid abrasive cleaners or scouring pads on stainless steel, they’ll scratch the finish. For stubborn splatters inside the microwave cavity, heat a bowl of water with lemon slices for 2 minutes, then wipe.
Check the ductwork annually for grease accumulation or blockages. Disconnect the duct collar (if accessible) and look inside with a flashlight. Heavy grease buildup is a fire risk. If the duct is clogged, you may need a duct-cleaning service or to replace sections.
Test the fan regularly. Run it on high speed once a week, even if you’re not cooking. This keeps the motor bearings lubricated and prevents dust from settling in the housing. If the fan sounds louder than usual or vibrates, inspect for loose screws or a bent fan blade.
Inspect the damper (the flap that closes the duct when the fan is off). Make sure it opens freely when the fan runs and seals tightly when off. A stuck-open damper lets cold air in during winter: a stuck-closed damper kills ventilation performance.
DIY maintenance keeps these units running for 10 to 15 years. Neglect the filters and ductwork, and you’ll see performance drop within a few years, or worse, face a grease fire.
Conclusion
A microwave range hood combo solves two kitchen needs with one appliance, freeing up counter space and simplifying installation. Whether you go vented or recirculating depends on your home’s layout and how much cooking heat you generate. Focus on CFM, noise ratings, and filter access when shopping, and don’t skip the mounting bracket prep, studs and proper clearance matter. Keep the filters clean, test the fan regularly, and this workhorse will handle daily meal prep for years without drama.