Table of Contents
ToggleStanding desks have become more than a trendy office accessory, they’re a practical solution for anyone tired of back pain, afternoon slumps, and sedentary workdays. Vivo standing desks offer an accessible entry point for homeowners looking to upgrade their workspace without hiring a contractor or investing in high-end commercial furniture. Whether you’re converting a spare bedroom into a home office or retrofitting an existing desk setup, Vivo’s range of manual and electric models provides flexibility, affordability, and straightforward installation. This guide walks through everything needed to choose, install, and optimize a Vivo standing desk for better ergonomics and productivity.
Key Takeaways
- Vivo standing desks offer an affordable solution between $150–$400, making ergonomic workspace upgrades accessible for home offices without commercial-grade pricing.
- Proper ergonomics require desktop height aligned with your elbow when arms hang at 90 degrees while seated, plus 10–12″ added for standing height.
- Electric models with dual motors are ideal if you switch between sitting and standing multiple times daily, while manual crank versions save money for occasional adjustments.
- Before purchasing a Vivo standing desk, measure your floor footprint, confirm vertical clearance at maximum height, and calculate total equipment weight to stay within the desk’s load capacity.
- Successful implementation requires gradual transition starting with 15–30 minute standing intervals, proper posture alignment, and regular maintenance including bolt checks and motor dust removal.
- Modular frame designs let you supply custom wood tops or reclaimed materials, giving DIY enthusiasts flexibility to match existing furniture while keeping installation straightforward.
What Makes Vivo Standing Desks a Popular Choice for Home Offices?
Vivo has carved out a niche in the home office market by prioritizing value and simplicity over premium features. Their desks typically run $150–$400, significantly lower than commercial-grade models that easily hit $800 or more. This pricing makes them appealing for DIY enthusiasts who want ergonomic benefits without enterprise budgets.
The brand focuses on modular designs that ship flat-packed, requiring basic assembly with included hex keys and wrenches. Most models use steel frames with powder-coated finishes and laminated MDF or particle board tops ranging from ¾” to 1″ thick. While not solid hardwood, these surfaces handle typical office loads, monitors, keyboards, laptops, without sagging, provided weight limits (usually 44–154 lbs depending on model) aren’t exceeded.
Vivo also offers unusual flexibility in configuration. Many of their standing desk frames are sold separately from desktop surfaces, letting users supply their own butcher block countertops, reclaimed wood, or custom-cut plywood if they prefer a specific aesthetic or need non-standard dimensions. This modularity appeals to DIYers who already have material on hand or want to match existing furniture.
Key Features and Benefits of Vivo Standing Desks
Adjustable Height Range
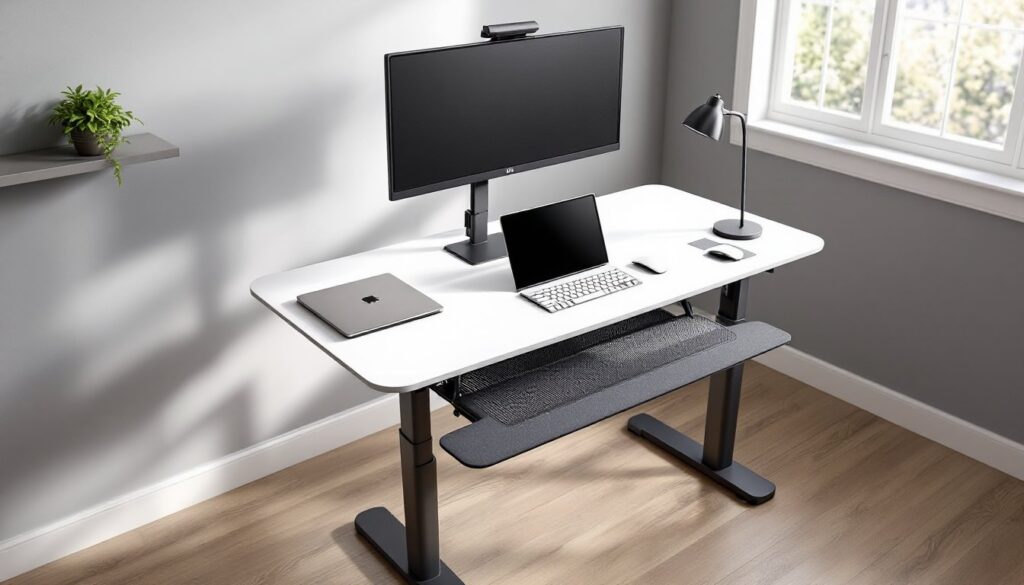
Most Vivo standing desks adjust between 28″ and 47″ from the floor, accommodating users from roughly 5’0″ to 6’5″ in both seated and standing positions. Electric models use dual-motor lift systems with programmable memory presets (typically three or four positions), while manual versions rely on crank handles or pneumatic lift mechanisms.
For proper ergonomics, desktop height should align elbow height when arms hang at 90 degrees. Measure from floor to elbow while wearing typical footwear, this becomes your seated desk height. Add 10–12″ for standing height as a starting reference.
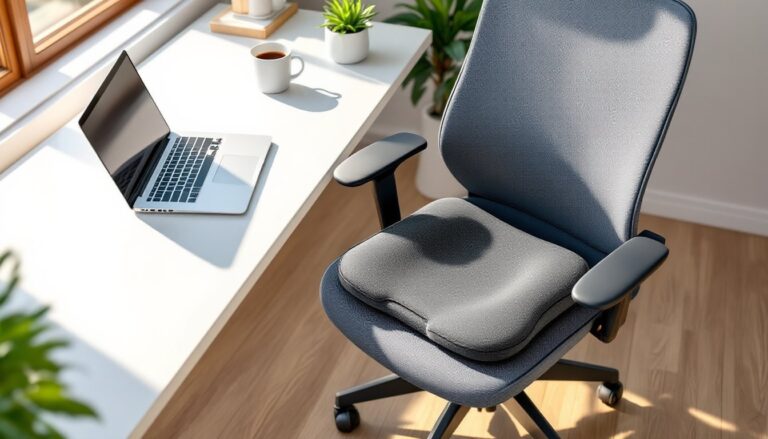
Stability and Load Capacity
Entry-level Vivo frames handle 44 lbs, suitable for a laptop and monitor. Mid-range models support 110–154 lbs, enough for dual-monitor setups with docking stations and desk lamps. Stability varies with height, desks extended to maximum reach will experience more lateral wobble than at mid-range positions. This is normal for most standing desks under $500.
To minimize wobble, ensure the desk sits on level flooring. Carpet can compress unevenly: use furniture coasters or a ¾” plywood base underneath legs to distribute weight. On concrete or tile, adhesive felt pads reduce shifting during height adjustments.
Cable Management
Vivo desks include basic cable trays or grommets to route power cords and monitor cables. These aren’t fancy, usually plastic clips or mesh baskets that attach to the underside of the desktop with screws. Plan cable runs before securing the tray. Leave enough slack to accommodate the desk’s full range of motion without tension on connectors.
For cleaner results, use cable sleeves or spiral wrap to bundle wires together before dropping them into the tray. Anchor power strips to the underside of the desk with command strips or industrial-strength Velcro to prevent dangling cables.
Desktop Durability and Finish Options
Vivo offers desktops in black, white, walnut, or natural wood grain laminates. These finishes resist light scratches and moisture but aren’t bulletproof. Use a desk pad or blotter under keyboards and mice to prevent wear patterns. Avoid placing hot coffee mugs directly on the surface, laminate can delaminate or discolor with prolonged heat exposure.
If you’re supplying your own desktop, aim for 1″ to 1.5″ thickness to prevent flex under monitor arms or heavy equipment. Pre-drill holes for frame mounting brackets to avoid splitting the wood.
Electric vs. Manual Vivo Standing Desks: Which Is Right for You?
Electric models use push-button or touchpad controls to raise and lower the desk. Lift speed averages 1″ to 1.5″ per second, so a full height swing from seated to standing takes 15–20 seconds. Memory presets let users save preferred heights, making transitions seamless. Drawback: they require a power outlet within reach and add $100–$200 to the cost. If the motor fails (uncommon but possible after years of daily use), replacement parts can be harder to source than manual components.
Manual crank desks use a side-mounted handle and gear reduction mechanism to adjust height. Expect 30–40 seconds of cranking for a full range adjustment. This is slower and requires physical effort, but there’s no electrical dependency, no cords to trip over, no motors to burn out. Manual models also tend to be lighter and easier to move during room reconfigurations.
Pneumatic lifts (a third option in some Vivo lines) use gas springs activated by a squeeze lever. They’re faster than cranks but slower than electric, and they don’t hold memory positions. They’re best for users who only adjust height occasionally.
Recommendation: If you switch between sitting and standing multiple times per day, electric is worth the investment. If you set it once or twice a week, manual crank saves money without much inconvenience. For desk surfaces wider than 60″ or heavier than 80 lbs, electric motors handle the load with less strain on components.
According to standing desk reviews comparing models across brands, Vivo’s electric desks rank well for reliability in the budget category, though they lack some advanced features found in premium lines.
How to Choose the Right Vivo Standing Desk for Your Space
Measure Your Workspace
Before ordering, measure the floor footprint and confirm the desk will fit without blocking doors, windows, or HVAC vents. Standard Vivo desktops range from 43″ to 63″ wide and 24″ to 30″ deep. Allow at least 36″ of clearance behind the desk if the room is also used for other purposes, this gives enough space to pull out a chair and walk past.
Height matters too. If you’re installing the desk under a sloped ceiling, attic, or loft, verify there’s enough vertical clearance at maximum desk height. Add 24–30″ above the desktop surface for monitor height and user head clearance.
Consider Desktop Size and Shape
A 30″ depth is standard for desks with monitors on stands. If you’re mounting monitors on articulating arms, you can get away with 24″ depth and reclaim floor space. Width depends on equipment: a single laptop fits on 43″, dual monitors need 55–60″, and triple-monitor setups or wide editing bays require 63″ or custom builds.
Rectangular tops are most common, but Vivo also makes corner desks (L-shaped) for rooms where wall space is limited. These require more complex assembly and careful measurement to avoid gaps at the corner joint.
Weight Capacity and Equipment Load
Tally the weight of everything going on the desk: monitors, laptops, docking stations, lamps, books. Don’t forget monitor arms, a dual-arm mount can weigh 15–20 lbs before you hang displays on it. Compare this total to the desk’s rated capacity and leave a 20% safety margin. Overloading a standing desk leads to motor strain, frame bending, or wobble.
Aesthetic and Integration
Vivo desks are utilitarian, they won’t win design awards, but they blend into most home offices without clashing. If your space skews toward modern or industrial design, black or white finishes work. For traditional or farmhouse interiors, walnut laminate or a DIY solid wood top integrates better. Publications like Design Milk often feature home office setups where affordable standing desks are paired with custom shelving and lighting to elevate the overall aesthetic.
Step-by-Step Installation and Setup Guide
Tools and Materials
Tools needed:
- Phillips screwdriver (manual or powered)
- Hex key set (usually included)
- Adjustable wrench
- Drill with bits (if pre-drilling desktop or mounting accessories)
- Level (2-foot or longer)
- Tape measure
- Safety glasses (when drilling)
Optional but helpful:
- Rubber mallet (for tapping frame pieces into alignment)
- Stud finder (if wall-mounting cable trays or monitor arms)
- Second person (for flipping the desk and lifting heavy sections)
Installation Steps
-
Unpack and inventory parts. Lay everything out and confirm hardware matches the instruction sheet. Vivo typically includes extra screws and bolts, don’t panic if counts seem off slightly.
-
Assemble the frame on the floor. Attach crossbars to the legs using the included bolts and hex keys. Finger-tighten first, then snug down once all pieces are aligned. Don’t overtighten, you can strip threads in powder-coated steel if you crank too hard. For electric models, route the motor cables along the crossbars using the provided clips before attaching the control box.
-
Mount the desktop (upside down). Flip the desktop so the underside faces up. Position the frame on top, centering it side-to-side and front-to-back. Mark mounting holes with a pencil, then pre-drill pilot holes using a 1/8″ bit to prevent splitting. Attach the frame with wood screws (provided). Use a level to confirm the frame sits flat, shim with thin cardboard if needed.
-
Install the cable tray and accessories. Screw cable trays to the underside before flipping the desk. Thread power cords and monitor cables through grommets now, it’s harder to reach once the desk is upright.
-
Flip the desk with help. This is a two-person job if the desktop is larger than 48″ or you’re over age 50. Lift from the frame, not the desktop edges, to avoid delaminating the surface from the core.
-
Level and test. Use a level on the desktop. Adjust leg levelers (small threaded feet at the bottom of each leg) to compensate for uneven floors. For electric desks, plug in and cycle through the full height range before loading equipment. Listen for grinding or uneven motor sounds, these indicate a frame misalignment that should be corrected before use.
-
Program memory presets. Most Vivo electric desks have a “M” or “S” button to save heights. Raise the desk to your standing height, hold the memory button until it beeps, then repeat for seated height. Test presets with the desk empty before adding monitors.
Safety note: Wear safety glasses when drilling. Keep fingers clear of moving parts during electric adjustments. If you have young children, use the desk’s child lock feature (if available) to prevent accidental height changes.
Maximizing Ergonomics and Productivity with Your Vivo Desk
Dial In Your Posture
Standing desks don’t fix bad posture, they just let you be uncomfortable at different heights. When standing, keep elbows at 90 degrees and wrists neutral. Monitor tops should sit at or slightly below eye level. If you’re looking down at the screen, you’ll develop neck strain whether sitting or standing.
Use a monitor riser or articulating arm to fine-tune screen height. Laptops require an external keyboard and mouse plus a stand to lift the screen, working directly on a laptop at desk height forces you to crane your neck down.
Transition Gradually
Don’t go from eight hours seated to eight hours standing overnight. Start with 15–30 minute standing intervals every hour. Gradually increase as your legs and lower back adapt. Many users settle on a 50/50 split or 60% seated, 40% standing.
Use an anti-fatigue mat to reduce pressure on feet and joints. Look for mats with ¾” to 1″ thickness and beveled edges to prevent tripping. Avoid mats with excessive cushion (memory foam types), they feel soft initially but cause balance fatigue over extended periods.
Integrate Movement
Standing isn’t inherently healthier than sitting, it’s the transition that matters. Shift weight between feet, take micro-breaks to stretch, and walk away from the desk periodically. Some users add a balance board or treadmill desk attachment, though these aren’t necessary for most people.
Optimize Your Tech Setup
Mount power strips under the desk so plugs move with the surface. Use cable clips along the desk legs to manage excess cord length. If you work in a room with fluctuating smart home technology like automated lighting or climate control, position the desk near outlets and smart switches for easy integration without extension cords snaking across the floor.
Maintenance
Every few months, check that bolts remain snug, vibration from adjustments can loosen hardware over time. Wipe the desktop with a damp cloth and mild cleaner: avoid abrasive sponges that scratch laminate. For electric models, vacuum dust from the motor housing to prevent overheating. Manual cranks benefit from a drop of lithium grease on the gear teeth annually.
Conclusion
A Vivo standing desk won’t transform your work life on its own, but it’s a solid, affordable platform for building better ergonomic habits. With straightforward assembly, reasonable stability, and enough configurability to fit most home offices, it delivers practical value without requiring advanced carpentry or a hefty budget. Measure carefully, install methodically, and adjust gradually, your back will thank you.