Table of Contents
ToggleChoosing the right table saw can make or break a home workshop. The 10 inch table saw has held its position as the DIY standard for decades, and for good reason. It hits the sweet spot between power, portability, and price, handling everything from ripping hardwood plywood to cutting dados for cabinet projects. Whether you’re building furniture, framing out a basement, or tackling trim work, a quality table saw 10 inch model delivers the precision and capacity most homeowners need without the footprint or cost of industrial equipment. This guide walks through what makes a 10 in table saw the go-to choice, what features actually matter when you’re comparing models, and how to use one safely in a home workshop.
Key Takeaways
- A 10 inch table saw is the DIY standard because it balances cutting capacity, portability, and affordability, handling everything from plywood ripping to cabinet joinery without requiring industrial equipment.
- Motor power, fence quality, and arbor compatibility are the most critical features when choosing a 10 inch table saw—prioritize induction motors for consistent cutting and T-square fences for repeatable accuracy.
- The four main types of 10 inch table saws range from portable jobsite models ($300–$600) to cabinet saws ($2,000+), with contractor and hybrid saws offering the best value for most home workshops.
- Proper safety practices—including blade guards, push sticks, correct body positioning, and pre-cut stock inspection—are essential to prevent kickback, blade contact injuries, and debris-related accidents.
- A 10 inch table saw significantly outperforms hand-held circular saws and miter saws for precision and repeatability on large panels and complex cuts, making it a worthwhile investment for serious DIY projects.
What Is a 10 Inch Table Saw and Why It’s the DIY Standard
A 10 inch table saw gets its name from the diameter of the blade it uses, a 10-inch circular saw blade that spins vertically through a slot in the flat worktable. The blade height adjusts to control cutting depth, and it tilts (usually up to 45 degrees) for bevel cuts. Unlike a circular saw you guide by hand, the table saw holds the blade fixed while you push the workpiece through it, resulting in straighter, more repeatable cuts.
The 10-inch format became the DIY standard because it balances cutting capacity with manageable size and cost. A 10 table saw typically cuts about 3⅛ inches deep at 90 degrees and around 2¼ inches at 45 degrees, enough to rip a 4×4 post in two passes or crosscut 2× framing lumber in one. That’s adequate for most residential projects, from building deck frames to constructing custom cabinetry.
Compared to 8-inch models (less common, lower capacity) or 12-inch cabinet saws (heavier, pricier, more power draw), the 10-inch strikes a middle ground. It runs on standard 120V household circuits in portable and contractor configurations, fits in a two-car garage without dominating the space, and accepts a huge range of affordable blades, combo blades, rip blades, crosscut blades, dado stacks, and specialty blades are all widely available in the 10-inch format.
For hobbyists and serious DIYers, the 10 in table saw offers professional-grade results without requiring three-phase power or a dedicated machine room. It’s the tool you can grow into and keep using for years as projects get more ambitious.
Key Features to Look for When Choosing a 10 Inch Table Saw
Not all 10 inch table saws are created equal. The difference between a frustrating tool and a reliable workhorse comes down to a handful of critical features.
Motor Power and Cutting Capacity
Motor power determines what you can cut and how cleanly. Portable jobsite saws typically run 15-amp universal motors that deliver around 4,000 RPM under load, enough for plywood, softwoods, and most hardwoods up to about ¾-inch thick. Contractor and hybrid saws often step up to 1.5 to 2 HP induction motors, which run quieter, produce less vibration, and handle dense hardwoods or thick stock without bogging down.
Pay attention to maximum rip capacity, the distance from the blade to the right edge of the fence when fully extended. Entry-level saws offer around 24 inches, which handles ripping a 4×8 sheet of plywood lengthwise if you feed it from the short side. Mid-tier and cabinet-style saws often provide 30 inches or more, giving you flexibility for wider panels and reducing the need for workarounds. Woodworking enthusiasts building custom furniture and storage projects often find the extra capacity worth the investment.
Also check the arbor size, most 10-inch saws use a 5/8-inch arbor, which fits standard blades and dado sets. Confirm the saw accepts a dado stack (typically up to 13/16 inches wide) if you plan to cut grooves for shelving or joinery. Not all saws support dadoes: some have arbors too short or lack the throat plate clearance.
Fence System and Accuracy
The fence is what keeps your cuts straight and repeatable. A flimsy or misaligned fence wastes material and creates safety hazards. Look for a T-square style fence (also called a Biesemeyer-style fence) that locks parallel to the blade on both the front and rear rails. These fences stay square under pressure and adjust with a single handle.
Key fence qualities include:
- Smooth glide and secure lock: The fence should slide easily across the rails and lock down without shifting. Cheap fences rack or flex when you push stock against them.
- Clear, easy-to-read scale: A quality cursor and measuring tape on the rail saves time and reduces measuring errors. Some saws include magnifying lenses or digital readouts.
- Tall face: A taller fence (3 inches or more) supports wide boards on edge for ripping and provides a stable reference for jigs and accessories.
Check if the saw includes miter slots (standard ¾ inch × ⅜ inch) that run parallel to the blade. These grooves let you use a miter gauge, crosscut sled, or aftermarket jigs. Good miter slots have tight tolerances, excessive play causes inaccurate crosscuts and dangerous kickback.
Finally, examine the tabletop material. Cast iron tables stay flat and dampen vibration but add weight. Stamped steel or aluminum tables are lighter and rust-resistant but may flex under heavy cuts. For stationary shop use, cast iron wins. For jobsite portability, aluminum or steel makes sense if the design is rigid.
Best Types of 10 Inch Table Saws for Home Workshops
10 inch table saws come in four main categories, each suited to different shop setups and budgets.
Portable/Jobsite Saws: These lightweight models (45–70 lbs) sit on folding stands or benchtops. They run on 15-amp motors, cut accurately enough for framing and rough carpentry, and store in a corner or truck bed. Portability comes at a cost, smaller tables, lighter fences, and more vibration. Best for contractors, weekend warriors, or anyone without dedicated shop space. Expect to pay $300–$600 for a decent jobsite 10 table saw.
Contractor Saws: Originally designed for job sites but now common in home garages, contractor saws mount on an open metal stand or closed cabinet. They use 1.5–2 HP induction motors (often running on 120V) that hang off the back of the saw. The larger cast iron table and sturdier fence improve accuracy over portable models. These saws handle hardwoods and sheet goods comfortably and often include upgraded miter gauges and dust collection ports. Weight ranges from 200–300 lbs, so they’re semi-portable with help. Pricing typically falls between $600–$1,200. This category is popular for serious hobbyists and home renovation projects that demand repeatable precision.
Hybrid Saws: Hybrids blend features from contractor and cabinet saws, enclosed bases for better dust collection, 1.5–2 HP motors (some 240V), and cast iron tables, but at a lower price than true cabinet saws. They weigh 300–400 lbs and fit tighter budgets ($1,000–$1,800) while delivering near-cabinet-saw performance. A solid middle ground for dedicated home workshops where the saw stays put.
Cabinet Saws: The gold standard for stationary workshops. Cabinet saws enclose the motor and belts inside a heavy steel cabinet, dramatically reducing noise and improving dust collection. They run 3–5 HP induction motors on 240V circuits, cut anything without hesitation, and feature precision-ground cast iron tables up to 27 inches deep. Weight exceeds 500 lbs, so plan for permanent placement. Pricing starts around $2,000 and climbs from there. Unless you’re running a professional workshop or tackling advanced woodworking, a cabinet saw is overkill for most DIY needs, but if you have the space and budget, it’s a lifetime investment.
For most homeowners, a contractor or hybrid saw offers the best balance of performance, cost, and footprint.
Essential Safety Tips for Operating Your 10 Inch Table Saw
Table saws are among the most dangerous tools in a workshop. Kickback, blade contact, and flying debris cause thousands of injuries every year, many preventable with proper technique and equipment.
Always use a blade guard and riving knife. The riving knife sits just behind the blade and prevents the kerf from closing and pinching the blade, which causes violent kickback. Modern saws include tool-free riving knives: older models may require removal for dado cuts. The blade guard covers the spinning blade and includes anti-kickback pawls that grip the wood if it reverses direction. Remove the guard only when absolutely necessary (like for certain jig work), and reinstall it immediately after.
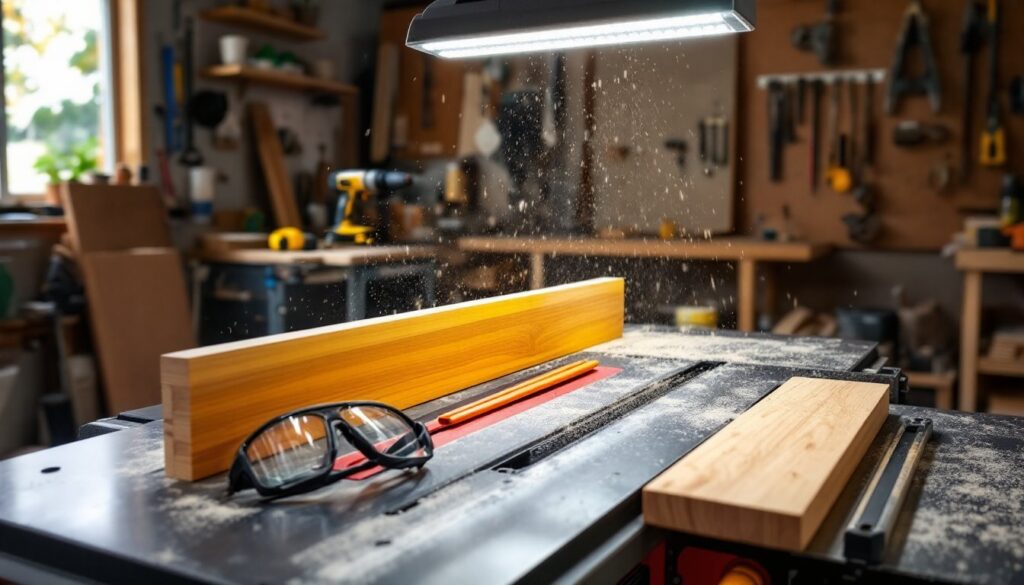
Wear proper PPE: Safety glasses or a face shield are non-negotiable, sawdust and wood chips fly at high speed. Hearing protection matters too: table saws run at 95–100 dB, enough to cause permanent hearing loss with repeated exposure. Skip gloves when operating the saw, they can catch on the blade or workpiece and pull your hand into the cut. Tie back long hair and avoid loose clothing or jewelry.
Use push sticks and push blocks for any cut where your hand would pass within 6 inches of the blade. A push stick costs a few bucks and keeps fingers out of the danger zone when ripping narrow stock. For wider panels, a push block with a handle and grip pad gives better control.
Never reach over or behind the blade while it’s spinning, even to grab a cutoff. Wait for the blade to stop. Don’t remove small offcuts trapped near the blade until the saw is off and the blade has completely stopped.
Stand to the side, not directly behind the workpiece. Kickback can throw a board back at chest height with enough force to cause serious injury. Position yourself slightly to the left of the cut line and keep your body out of the blade’s path.
Check for proper setup before every cut. Ensure the fence is parallel to the blade (use a dial indicator or combination square to verify). A misaligned fence binds the wood and causes kickback. Make sure the blade is sharp and appropriate for the material, dull blades require excessive feed pressure and increase the risk of binding. Set blade height so teeth protrude about ¼ inch above the workpiece: too high increases kickback risk, too low causes burning.
Support long or wide stock with infeed and outfeed tables or roller stands. A sheet of plywood tipping mid-cut can twist and bind against the blade. If you’re cutting large panels solo, get help or use auxiliary support.
Inspect stock for nails, staples, or knots before cutting. Hidden metal can shatter a carbide blade and send shrapnel flying. Loose knots can pop out mid-cut and jam the blade.
Finally, unplug the saw when changing blades or making adjustments below the table. Accidental starts have maimed experienced woodworkers. It takes two seconds to pull the plug: it’s worth it.
Conclusion
A quality 10 inch table saw anchors a productive home workshop and opens the door to projects that demand precision and repeatability. Whether framing a wall, building furniture, or crafting custom trim, the right saw saves time, reduces waste, and delivers results that circular saws and miter saws can’t match. Focus on motor power, fence quality, and the type that fits your space and budget. And remember, no cut is worth risking your hands. Invest in the safety gear and develop the habits that keep you working safely for decades to come.